My Pinterest obsession has kept me very busy lately. Not only do I find myself compulsively pinning but actually trying to create copycats of the items that are really striking my fancy. The candlestick shown below is the product of one of my endeavors. I am very pleased that they came out nicely. I am also proud to report I only burned myself once with the hot glue gun and that the burn barely hurt at all. Wahoo!!!
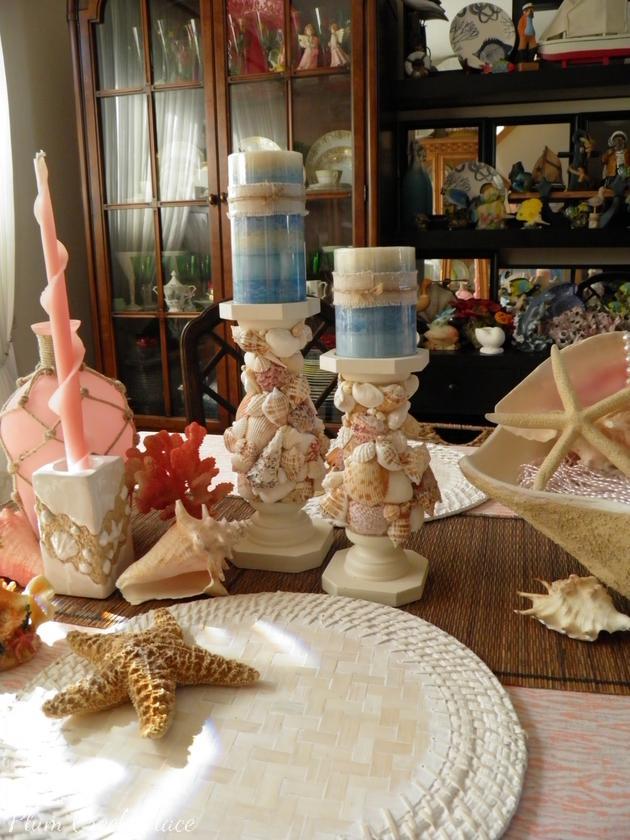
I started with two large and and two medium candle holders from Walmart, all four
were purchased at thrift stores (one set over a year ago and one set this spring).
I had already painted one of each size last year.


I took both sets outside and painted the wood finish with three coats of Rust-oleum's
Paint Plus 2X ultra Cover in Heirloom White in the Satin finish. I freshened the candle holders that had already been repainted with another light coat of the same color.
.

I let them dry several hours outside before bringing them into the house. They sat on the mantle over a week to let the paint cure a bit before I started gluing shells onto the freshly painted surface.

I gathered up the shells that I had been collecting from the thrift stores for several years.
And set them on my kitchen island so that I could sort them by size and shape.

I also had bought a couple of bags of small shells from Marc's for just $1.49 per bag.
Love that Marc's close out section.

With the hot glue gun warmed up and an assortment of makeshift tools
I glued a few shells at a time in tandem to the candle holders.

I started at the bottom with just a couple of shells

As I finished each section on each candle holder I would
set it aside to let the glue harden and set up.
set it aside to let the glue harden and set up.

I added shells from left to right and building upward while matching the shells as best as I
could on each of the holders as I went along. When I was about thirty percent done
I set them aside for twenty minutes so they could set up.
(while I started dinner)
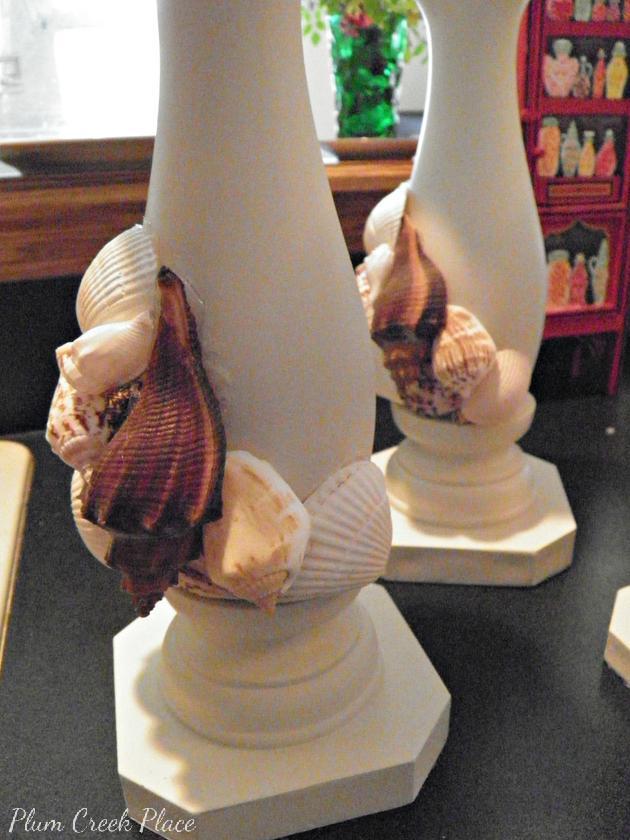

As I progressed with the gluing I would compare the holders to each other to make
sure that the pattern was staying consistent on all of them.

When I was about two thirds of the way up with the shells on the candle holders
I switched to the top row and started filing the open space
between the top row and the bottom two thirds
of the candle holders.
 Right about then my back started to hurt. I set up a TV tray between the island and the kitchen

counter so I could sit down to finish gluing the shells.

Once the shells were all in place I started placing tiny shells into any small
empty gaps between the shells.


Easy Peasy!
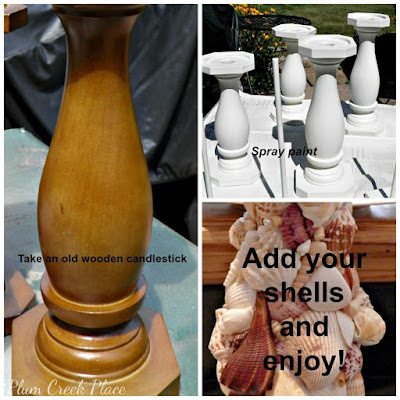


Here is a sneak peak of my tablescape for Thursday.

Tablecloth description:
Park Designs Indian Summer Collection, Windowpane checks are
complimented with bands of chocolate and tan with pinwheel corners.
The Indian Summer 60 x 84 Tablecloth is a lovely year-round table
covering.

Remember to thrift on ladies, thrift on!
Sharing at:
Susan's Metamorphosis Monday
Remember to thrift on ladies, thrift on!
Sharing at:
Susan's Metamorphosis Monday
Marty's Inspire Me Tuesday
