Friday, August 7, 2015

DIY Giant Clam Shell And Sunrise Seashell Tablescape

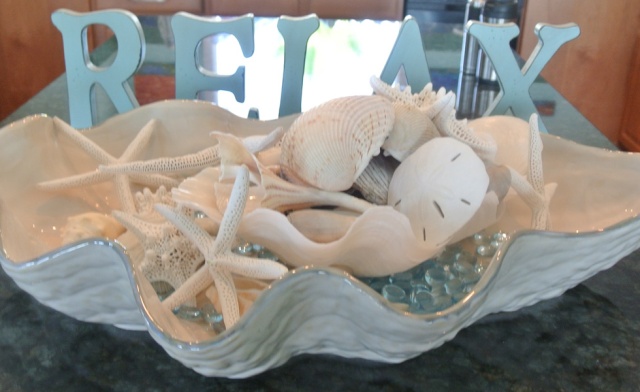
Darn that Pinterest!  I have spent hour after hour looking at pins of wonderful inspirational coastal ideas.  I was so inspired by pictures of giant clam shell candle holders from Pottery Barn that I had to try to make a copycat giant clam shell like theirs.  Jenna at The Painted Apron created a wonderful coastal setting using a a large Pottery Barn clam shell that I just adore.  Pottery Barn also offered an organic and rustic looking clam shell more recently that I kind of liked too.  There were others that I found on Pinterest but these two were the most inspiring giant clam shell pins for me.  I tried to combine a bit of the character from each of these lovely large clam shells and came up with THIS......
DIY giant clam shell - Plum Creek Place
A little bit rough and a little bit sleek,  a combination of the inspirational photos that I found while looking for Coastal "By The Sea" pins.
You can see the details about this PB clam shell here - http://www.potterybarn.com/products/giant-clam-shell/  Notice the rough and coarse finish on this PB shell.
 Giant Clam Shell

You can see Jenna's "Seafood Lunch" post here -      http://thepaintedapron.com/2012/09/20/tablescapes-seafood-lunch/  See how beautiful and sleek Jenna's shell looks. 

The Painted Apron Giant clam Shell
I started with a clear plastic (acrylic?) clam shell bowl.  Amazon has a similar bowl like this in white available here at Amazon.
DIY Giant clam Shell - Plum Creek Place
I found two large clam bowls and three smaller ones at a garage sale at a very reasonable price early in the summer.  When I saw them I grabbed them up right away for my future clam shell projects.  I took one of the large bowls and wrapped it very snugly in Christmas red Saran Wrap with the thought that I would be able to pop the plaster shell off of the clam shell form when I was finished applying plaster of Paris to it,  that did not happen (it was stuck tight).
DIY Giant clam Shell - Plum Creek Place
Once the shell was wrapped with the Saran I covered it with cheese cloth that was cut to size and trimmed at the edges so as not to hang over the lip of the bowl.
DIY Giant clam Shell - Plum Creek Place
I mixed one of the four one pound bags with water per the package instructions that came in the All Purpose Plaster of Paris 4LB size that I had purchased at Walmart (I did not find the four pound size on Walmart's website when I looked for it today) and very quickly applied an even coat of the mixture over the cheesecloth covered bottom of the shell.  If you have good fresh POP it will be hardening within fifteen minutes or so.  One of the bags of plaster did not harden up for several hours,  a pretty good indication that the plaster was not fresh.  The very small print on the box said made in China.  Hmm.....  Maybe they slipped in some old stuff at the factory.  I was letting the plaster dry overnight between the coats anyway so there was no harm done. Between each coat of plaster I placed a layer of cheesecloth to add strength to the shell.
DIY Giant clam Shell - Plum Creek Place
After the last of the four coats of plaster had dried overnight I trimmed out the red saran from the inside part of the bowl with a razor.  That left the plastic interior of the bowl with a good smooth edge transitioning to the plaster.  The plaster edge around the lip of the bowl was shaped first with an old paring knife and then I took the bowl outside to be sanded with fine sand paper for a smooth appearance. The inside of the bowl was spray painted with Rust-Oleum Paint Plus 2X ultra cover in satin finish Heirloom White to give a nice clean sleek appearance to the inside of the bowl like Jenna's inspirational clam shell bowl.  The exterior got two coats of Anita's all purpose acrylic Latte (11128) Craft Paint.  While the second coat of the Latte color paint was still wet I coated the paint heavily with fine gain sand from the craft store to give a coarser finish like the Pottery Barn inspiration bowl with the rough exterior. This is what it looked like after I knocked of the excess sand with a small wire brush and filled the interior with clean aquarium gravel.
DIY Giant clam Shell - Plum Creek Place
I added some coral color bead strands to the surface and then added the shells and candles that you saw in the first picture..
Plum Creek Place - DIY giant clam shell Coral Sunrise Tablescape.

The following "Sunrise" tablescape pictures were actually taken before the pictures from my last tablescape.  I have been enamored with the color coral this summer and wanted to create a pretty white and coral tablescape.  Of course I used the clam shell centerpiece that I had made plus my lovely mermaid along with white rattan chargers from the clearance isle at HomeGoods for three dollars each and the pretty coral and white striped placemats that were on clearance for $4.50  for the four piece set at TJ Max.  A solid white tablecloth added extra brightness to the setting.  Other than that this coral sunrise sunshine table is pretty much the same as the last tablescape I posted.  Just a few pictures and even fewer words for this Tablescape.
Plum Creek Place - Coral Sunrise Tablescape.
The light streams in through the dining room window early in the morning.
Plum Creek Place - Coral Sunrise Tablescape.

Plum Creek Place - Coral Sunrise Tablescape.

Plum Creek Place - Coral Sunrise Tablescape.

Plum Creek Place - Coral Sunrise Tablescape.

Plum Creek Place - Coral Sunrise Tablescape.

Plum Creek Place - Coral Sunrise Tablescape.

Plum Creek Place - Coral Sunrise Tablescape.

Plum Creek Place - Coral Sunrise Tablescape.

Plum Creek Place - Coral Sunrise Tablescape.


Plum Creek Place - Coral Sunrise Tablescape.

Plum Creek Place - Coral Sunrise Tablescape.

Plum Creek Place - Coral Sunrise Tablescape.

Plum Creek Place - DIY giant clam shell Coral Sunrise Tablescape.

Plum Creek Place - Coral Sunrise Tablescape.
The Giant Clam Shell centerpiece was the first of four seashell projects that I wanted to make this summer.  I started a bit late but I am making steady progress on them.  My next post will be on the DIY shell encrusted candle sticks that I made this past week.  There will be a complete tutorial on how to create the candlesticks and a new tablescape.
Shell Encrusted Candlestick Tutorial Preview
From an old Walmart Faux Wood candlestick to a shell encrusted Coastal "By The Sea" look candlestick.
DIY shell encrusted candle sticks - Plum Creek PlaceStop by next week for details on my "Fall tablescaping package" Blogaversary give-a-way.  

FYI - I receive no compensation in any form from any of the brands and places that I mention on my blog.


I will be sharing at:

Jann's Share Your Cup Thursday

Christine's Table It Link Party
 Rustic and Refined
 

Friday, July 31, 2015

Coral and Pink Mermaid Tablescape

While out thrifting earlier this year I found a lovely little mermaid figurine,  her name is Haley from The Sirens Of The Sea Collection from Munro Enterprises issued in 2003.  She is such a pretty little thing,  I knew from the moment I saw her that I would create a Summer "By The Sea" tablescape with her as my centerpiece.     Isn't she Lovely?
Plum Creek Place - Mermaid Tablescape - Haley from The Sirens Of The Sea Collection from Munro Enterprises issued in 2003.
Shades of coral and pink dominate throughout this tablescape.  The thrifted table covering was cut from a four yard piece of coral and white textured polyester,  the pattern on this material reminds me of ocean waves.
Plum Creek Place = Coral and pink Mermaid tablescape
 The shells on the table came from thrift stores and garage sales over the years.
Plum Creek Place = Coral and pink Mermaid tablescape
The wave-like pink taper candles are also a thrift store purchase, as are the polka dot champagne glasses and the pretty pink swirl stemmed sherbert glasses.
Plum Creek Place = Coral and pink Mermaid tablescape
Another un-named mermaid (also thrifted) was placed back to back with Haley within a thrifted shell wreath that has a nest of coral colored beads (the beads were bought from Marc's,  my favorite close-out store).
Plum Creek Place = Coral and pink Mermaid tablescape
Pale coral colored napkins trimmed with creamy white lace were placed beneath shell shaped salad bowls. Pink bottles trimmed with jute twine came from the close out section at Marc's.  The shell shaped "By The Sea Pattern" salad bowls were made by American Atelier.  I bought them off of Ebay many years ago.
Clam shells and sea shells are nice under the candles to catch any dripping wax. Plum Creek Place = Coral and pink Mermaid tablescape

Plum Creek Place = Coral and pink Mermaid tablescape
The polka dot champagne glasses were bought from Goodwill.
Plum Creek Place = Coral and pink Mermaid tablescape

Plum Creek Place = Coral and pink Mermaid tablescape

Plum Creek Place = Coral and pink Mermaid tablescape

Plum Creek Place = Coral and pink Mermaid tablescape

The plain white candles have a piece of material cut and frayed from an extra napkin then glued to the candle with a starfish.  Faux coral was painted with Krylon's "Sunrise" spray paint.


My next post is a tutorial on making a large clam shell centerpiece and another mermaid tablescape (see teaser picture below).

Plum Creek Place - Mermaid Tablescape
 Remember to thrift on ladies,  thrift on.

I will be sharing at:


Thursday, June 25, 2015

Playing in the Fairy Garden

My goodness how time flies,  here it is nearly the end of June and the Fairy Garden is finally about ready for the Summer.  The twin fairies are happily seated beneath the China Doll tree an a pretty pink bench.  The fairies take turns sitting on this bench.  It seems to be their favorite spot in the garden (I think they feel secluded and safe there).  There is another bench in the fairy park but the fairy babies have claimed it as their own,  they like to watch the cerulean blue water as it bubbles down the creek and the babies just adore the frog pond in the park too!  The China Doll plant (that looks like a tree) was dug up late last fall and brought in for the winter.  It did very well in the Eastern facing  window in the dining room .  At the end of February I pruned all of the new growth back and took cuttings for a half a dozen new trees.  At the first of April  I started lightly fertilizing to encourage new bushy growth.  I pinched off the tiny new branches that started to grow around the base of the plant.

Fairy Garden 2015, China Doll Tree

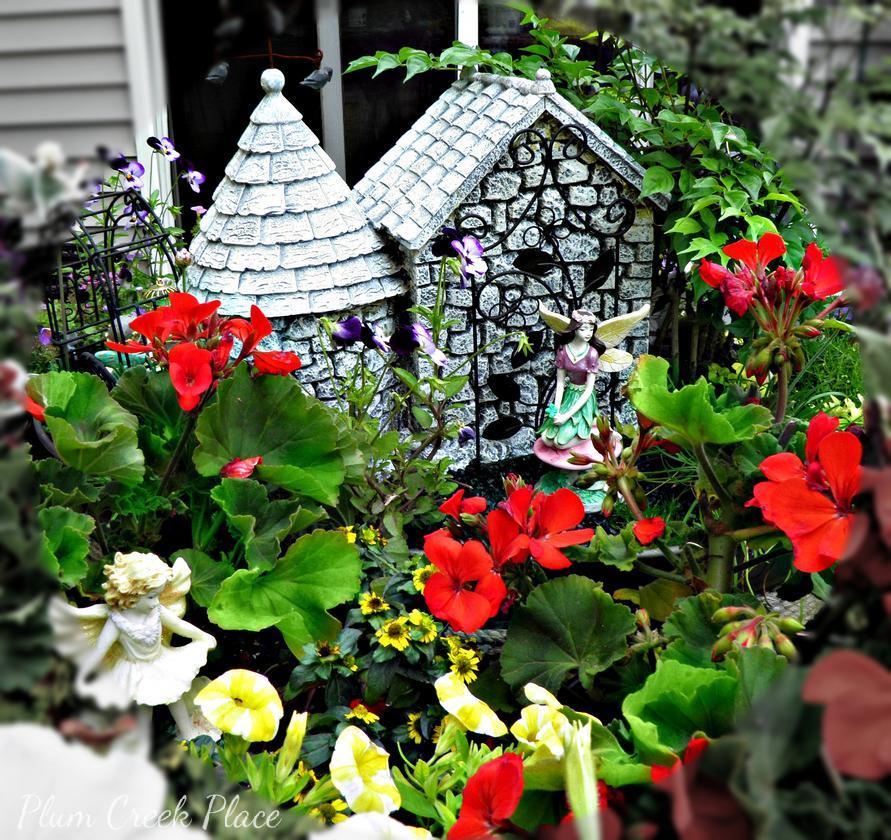
When I designing the Fairy garden last summer I played with the placement of the castle and the plants until I was happy with the layout.
The fences and the rest of the plants were added after the major components were in place. Last but not least I added the fairies.  I spent days playing with them until I was happy with the overall effect.
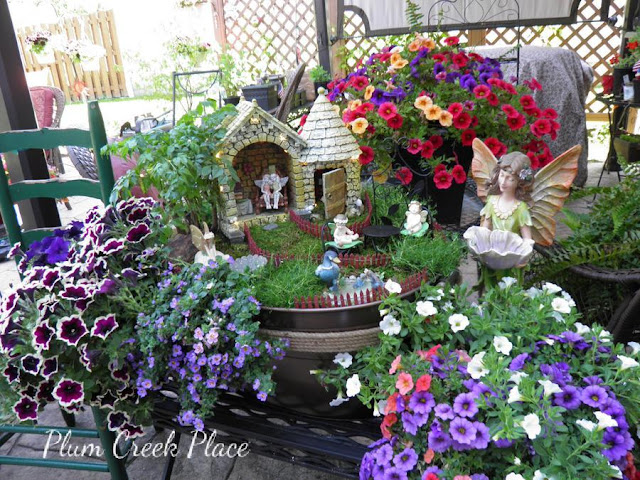
Fairy Garden 2014
2014 Fairy Garden
Several baskets of flowers were placed on the table that the fairy garden was on and onto the table behind the fairy garden. This year I created several new fairy garden settings from old planters from last Summer (I reused the soil too). You probably have a bunch of old planters laying around too.
                                                                    From this,
Ready to up-cycle to a new fairy garden planter box.

To this.
Fairy Garden 2015 made from thrift store finds.

An old bird house,  a fairy,  some creeping Jenny,  mini herb pants, one pop-up viola, and a mini bird bath.  Plus a welcome gnome in the back.
Fairy Garden 2015 made from thrift store finds.


The best part of this post was getting to play with the fairies so I could take "just the right" pictures.


Fairy Garden 2015 made from thrift store finds.


Isn't this little thrift store fairy just the cutest little thing?


This fairy garden planter is to the left of the main Fairy Garden.
Fairy Garden 2015 made from thrift store finds.
The second planter was used to create a park setting complete with a frog pond and a creek for the fairies. As I mentioned before, the baby fairies took over the park bench.
Fairy Garden 2015 made from thrift store finds.


The Frog Pond.

Fairy Garden 2015 made from thrift store finds.


The green fairy looks bored with babysitting the infant fairy.


Fairy Garden 2015 made from thrift store finds.

Fairy Garden 2015 made from thrift store finds.
The main Fairy Garden planter has black fish tank gravel added this year,  but other than that,  it is pretty much the same.  The babies have a parrot in their bird cage this year.  See the mini thyme plants peaking out from under and behind the table.... they have the cutest little pink flowers.
Fairy Garden 2015 made from thrift store finds.
Yes,  the fairies have traded places again. The blue winter fairy is enjoying popping her toes up in the sunshine.  Not to long ago she was out getting frostbite on those little toes.
Fairy Garden 2015 made from thrift store finds.
Brrr.... it was a very long cold winter.  It has only been a few weeks since our last frost here in the North Coast of Ohio.
Just the fences, the castle, and a couple of faux pine trees were left outside to winter over.
The back of the Fairy Garden.
Fairy Garden 2015 made from thrift store finds.


The purple fairy looks elegant in her garden setting.
Fairy Garden 2015 made from thrift store finds.

A pretty little pale yellow fairy dances in a flower basket behind the castle.
Fairy Garden 2015 made from thrift store finds.

The two little garden fairies in the basket below have been out picking flowers for their dinner table tonight.
Fairy Garden 2015 made from thrift store finds.

There are two other Fairy planters that are sitting on another iron table next to the patio door.  Both were created from thrift store buys.
Fairy Garden 2015 made from thrift store finds.

Fairy Garden 2015 made from thrift store finds.

and
Fairy Garden 2015 made from thrift store finds.
I am working on two more Fairy Garden Planters,  with a little luck it may stop raining within the next day or two so I can get back to working on my fairy garden.

The Korean Lilac bush in the front yard bloomed profusely this year.  Last year and the year before that late frosts blackened most of the buds.  This year we were home to cover them for the last frost,  a couple of days later it was in full bloom.

*********


I hope to be posting my first Summer tablescape for this year within the next week or so.  Until then,  remember to thrift on ladies, thrift on. 

I will be sharing at: